
Mini-bulbs are an effective, reliable and cheap way of replacing electric matches for firing ejection charges in rockets which use electronically deployed recovery gear. The bases are reuseable sockets which can stay permanently attached and wired into your rocket. The bulbs provide the filaments which, when cut open, can be filled with black powder.
The current requirements for the filaments I have measured are about two or three amps. This is more than low-current electric matches or flashbulbs, but nine-volt alkaline batteries can fire mini-bulb charges easily.
|
|
The raw materials: an old string of Christmas light mini-bulbs. Next time one burned-out bulb takes down an entire string, don't throw it away! Most of the bulbs are still good. |
|
|
I make my mortars using small plastic sample tubes which I "borrowed" from my lab at work. The inside diameter is perfect for a press-fit of the bulb sockets. These particular tubes need to be cut off (at the 1.0 ml line, if you must know) to allow the socket to seat all the way down. But really, anything you can find which will hold the sockets will work. I have used vinyl tubing. (It's hard to attach to bulhheads, but works.) You could drill a hole in a block of wood and screw it down. Use your imagination, for Pete's sake! I should caution you about one thing, though. If you mount the socket in a hole drilled all the way through a bulkhead, take care that there isn't a pathway for the gases to get through. My sockets are hollow--maybe yours aren't. |
|
|
| Drill a hole in the bottom for a mounting screw, a #4 flat-head in this case, and in the side for the wires to exit. Screw the mortar down to a bulkhead, then string the wires through the hole in the side, and jam the socket in. Feed the wires through the bulhead, making sure that the holes don't allow ejection gases through to foul up your electronics. I use silicone caulk where the wires enter the holes. | |
|
The mini-bulb need to be broken or cut open. I use a Dremel tool with a cut-off wheel. You can use a pair of cutters, but it's generally messier since you don't have much control over where the glass breaks. |
|

|

|
| Apply some glue to the outside of the glass. I use epoxy (but see note below). Slide a length of vinyl tubing over the cut bulb. The bulbs I've used mate perfectly with 3/16" I.D. tubing. Vinyl tubing can be fairly stiff, so get a more flexible variety if you can find it--this step will be easier. | ||
|

|
| For over 3/4 grams of black powder, I like to use tubing with a larger inner diameter, so that the pyro doesn't turn out so long. To do this, I glue a short section onto the bulb first, then add another larger-diameter tube (whose I.D. matches the small tube's O.D.) later. | |
|
|
| Inspect the wires at the bulb's base. If they're bent as in the left photo, it won't work. Straighten the leads as shown at the right. Perform a continuity test before adding the dose of black powder. | |
|
|
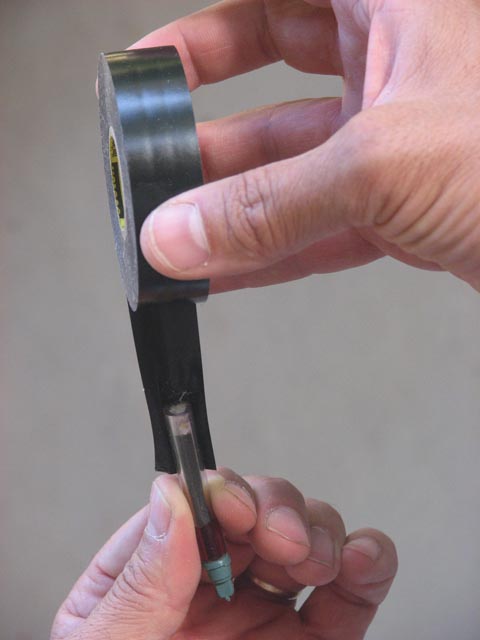
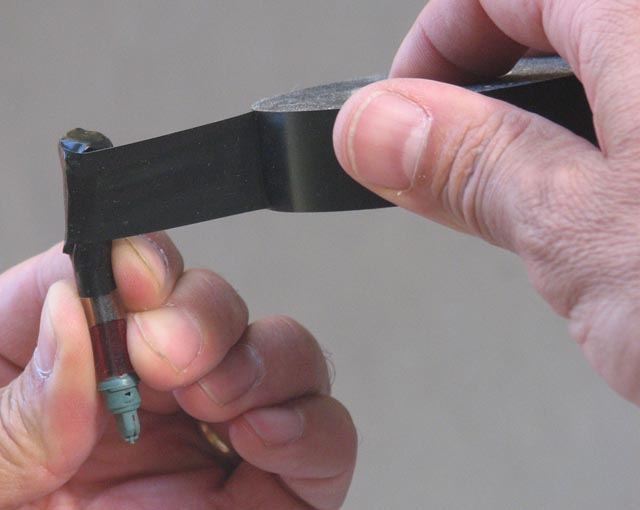
| Stuff the remaining space between the top level of the black power up to flush with the end of the tube with wadding. You want to be sure that the powder doesn't fall away from the filament when your pyro is oriented with the filament up. Wrap electrical tape over the end of the tube, fairly tight, twice in an X pattern. Then go around at least once to hold down the ends. | |

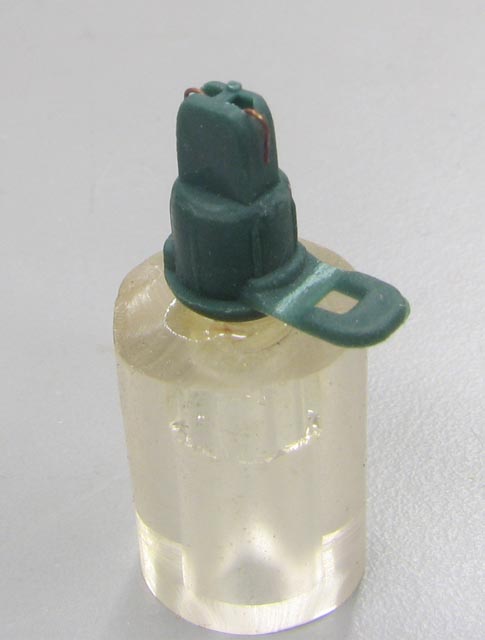
A pyro charge installed into a mortar on a piston's bulkhead |
The length of the tube dictates how much black power it can hold. This
fact can be used to make it easy to measure BP without using scales or
tiny volume-measuring gizmos. Since FFFF black power has a density
very close to 1 g/cc, grams and milliliters are interchangeable. When
you're using 3/16" I.D. tubing, the length required for various volumes
can be calculated, given the fact that the cross-sectional area is
17.8mm2. The tubing gets long above about 3/4 g, and I worry
about how effectively the black powder ignites when it starts so far away
from the spark. As I mentioned above, you can make charges using a short
length of spacer tubing on the bulb, covered by a length of larger-diameter
tubing. The most common size 3/16 I.D. tubing has 1/16 wall thickness, and
thus you'd put 5/16 I.D. tubing over it. I found some with a wall thickness
of 3/32, which is great because that makes for shorter lengths of 3/18 I.D.
extension tubes. The calculations need to take into account the 10 mm or
so of length at smaller diameter (178µl):
| BP volume | 3/16 Ø | 5/16 | 3/8 |
|---|---|---|---|
| 0.25 g | 14 mm | ||
| 0.35 g | 20 mm | ||
| 0.5 g | 28 mm | ||
| 0.75 g | 42 mm | 19 mm | |
| 1 g | 56 mm | 23 mm | 19 mm |
| 1.5 g | 31 mm | 25 mm | |
| 2 g | 39 mm | 30 mm | |
| 3 g | 55 mm | 41 mm |
By all means, verify the lengths using your own tubing and bulbs, since the dimensions won't match mine precisely. Remember that 4F black powder settles, by maybe 10%. And ground-test your charges! (Wanna hear my theory about the limits of piston travel?)
On batteries . . . I have observed a 9V alkaline battery attempting to power a 3Ω load. It's a sad sight. The voltage drops to about 4V, but it does provide the 3A or so. Afterwards it's breathing pretty hard. A 3-4Ω resistance reading is pretty typical for mini-bulbs. My favorite battery is a 2-cell 145mA LiPoly pack from Kokam. Expensive, yes; requires a special charger, also yes. But it will discharge comfortably one Amp continuously, and short bursts much higher. And it only weighs ten grams. Or the Kokam 340 mAh LiPoly cells which will discharge at 6.8A (20C, i.e. 20 times capacity). There's also a new Li-Fe-PO4 rechargeable in 9V form factor which can be charged using a Ni-MH 9V charger, will supply 2.7A and weighs 23 grams. I have a few of these and flown them reliably, but haven't really put them through their paces. Reasonably priced at $6 from www.batteryspace.com.
Toss an extra socket into your range box along with a multimeter. There's nothing worse than going through the hassle of measuring and loading black powder into a dud. (Okay, there is--installing a dud twice.)
I also meant to say something about how epoxying the vinyl tubing onto the glass may be entirely worthless. Every time I've examined the debris from my blown charges, the tube has blown off the bulb, and the tape is intact. I would like to know the effectiveness of unglued charges vs. glued ones.
Last updated Mar 30, 2009