"Tooth Walker"
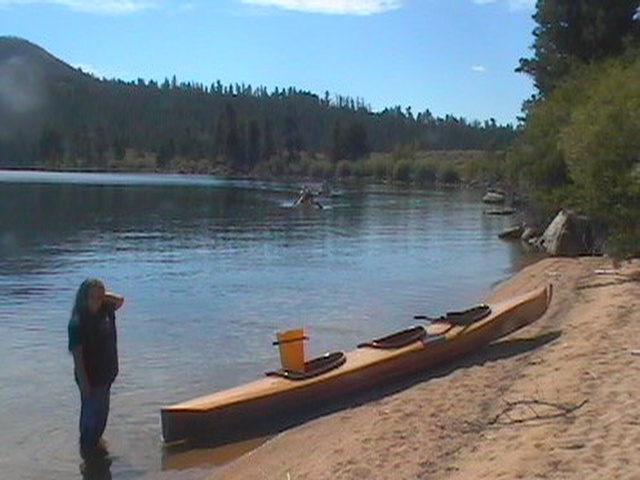
Tooth Walker is a bidarka hybrid of my desing. I made her as a three hole kayak so that I could take the kids and no one had to stay behind. The length should have been a bit longer but I do not have room nor did I feel like trying to handle and store a twenty-six foot kayak. She ended up a little less than twenty-one feet long and I think not much heavier than the canoe. There is very little rocker so she tracks like you would not believe but turns line the QE II.
For this project I bought a thickness planer and planed the strips before I did the cove and bead. This made the strips fit much tighter and since they were all uniform, the fairing went much faster and easier. The other change was that the strips were cut from fence planking and are much thinner. This made it easier to bend around some of the compound curves and tight bends. The strips were beveled and joined as they were applied to the forms.
Now for the photos:
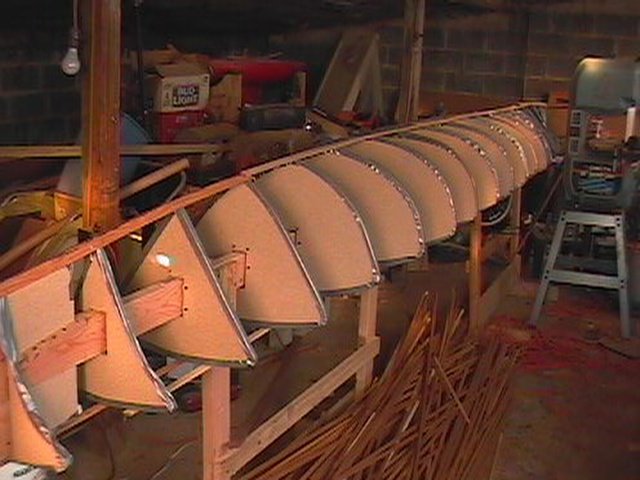
This is the start of the forms. You can see how much of the shop is taken up by the forms. Because of the length, the whole thing is very wobbly and it took a long time for me to stabilize the mess so that I had the forms all lined up and I could start stripping. The strips you see are just there to hold things together.
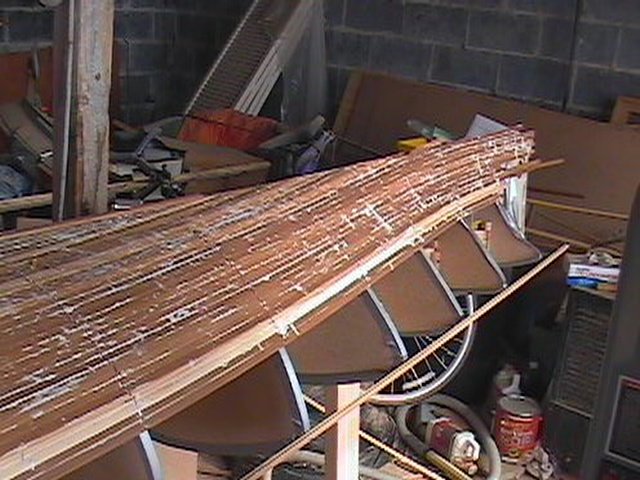
This shows what she looked like as the strips were going on.

This is a different view of the same state. This is a look at the stern. You can see that it is a little fuller than a Greenland kayak and I added a little convex flair to the end. I think I should have stayed with the normal convex and fuller transom.
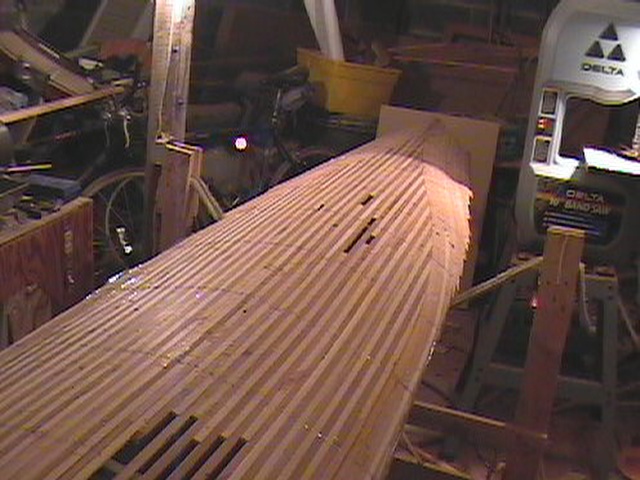
I decided to make a change from the normal order of construction. For this project, I made the deck with the hull still on the form so that I could make sure that they could match up as best as possible. I also wanted to glass the inside of both the deck and the hull then join them with glass tape and epoxy inside and lap the deck and hull glass on the outside so that the seam was not as pronounced as when you used glass tape on the outside. Here you can see that I have not tried to fill in where the cockpits will go. This saves trips but makes it hard to keep a consistent shape.
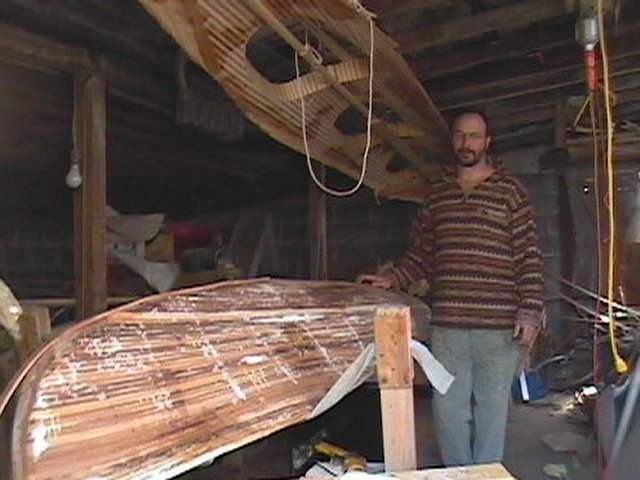
This is a shot of me after the hull and deck have been removed from the forms and I have suspended the deck from the ceiling while I fair the hull. There is not much head room so I frequently hit my head on the rough edges of the deck. Not much choice because there was nowhere else to go with the deck. The pants I am wearing are being held together by the glue and epoxy that landed on them. Make sure you wear clothes you want to toss when doing this. You can also see the start of the bow sprit.
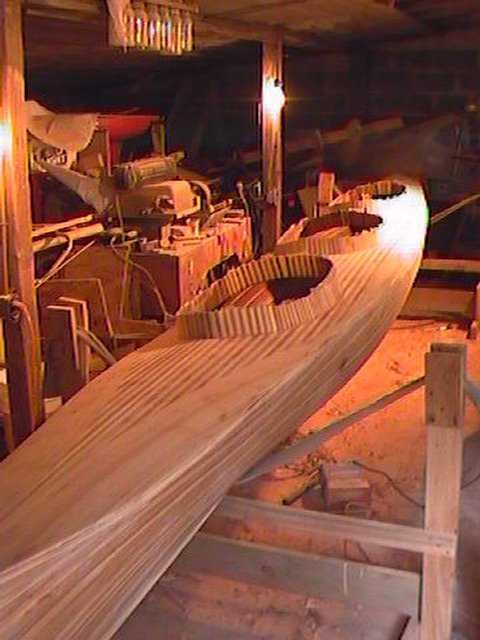
This is a shot of the hull and deck joined while I was fairing the hull and deck. The hull and deck are one now and I am fairing them together, turning the boat on the cradle as I need. It is very light at this point because there is not much on the boat still.
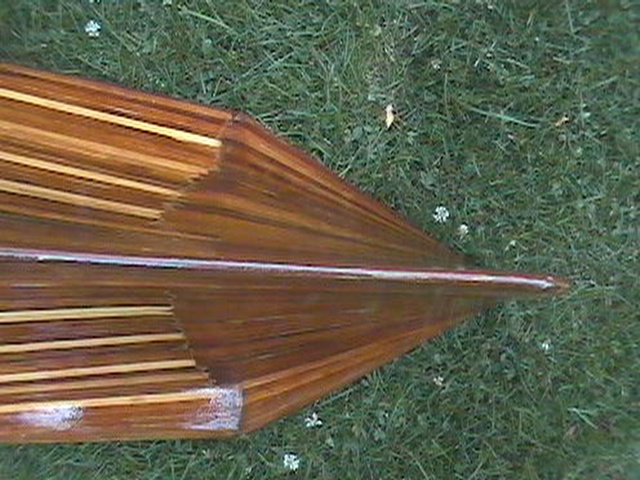
This is a shot of the finished stern.
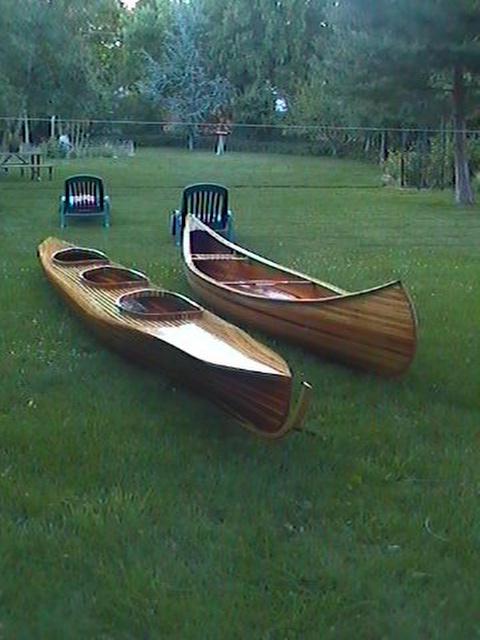
This is a shot of the canoe and kayak side by side for comparison.
On the water at "Half Moon Lake" near Pindale, Wyoming.